
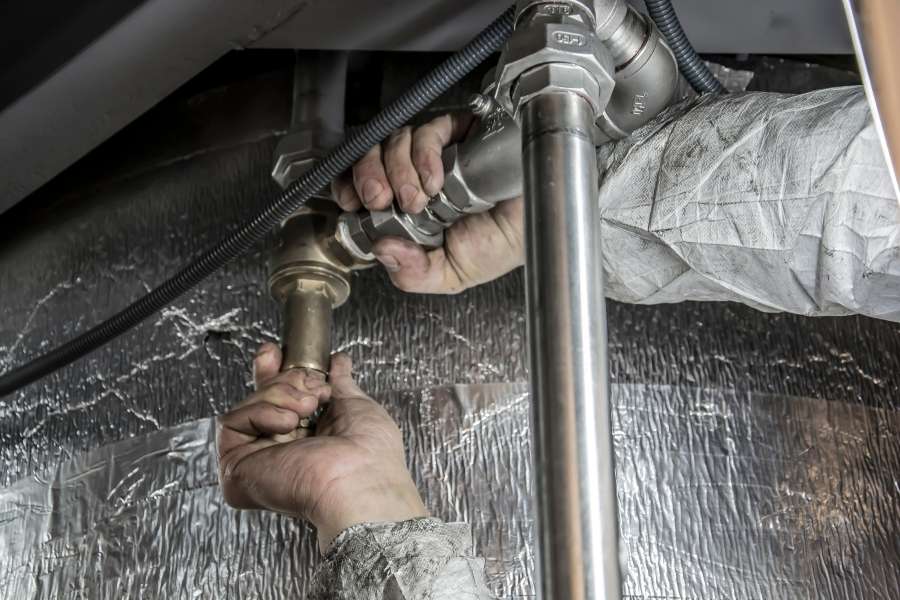
Picture waking up on a sub-zero morning without running water. A sudden freeze turns standing water into solid ice within hours. Dealing with frozen pipes ruins your morning and wrecks your budget. Water expands as it freezes, placing massive physical strain on plumbing walls. That silent pressure buildup often splits rigid supply lines wide open. Burst lines dump hundreds of gallons of water behind finished walls. Flooding ruins drywall, warps wood floors, and invites mold growth quickly. Professional water restoration bills reach thousands of dollars very fast. Thankfully, you can stop this winter disaster with simple DIY habits. You do not need professional plumbing licenses to protect your water lines. With smart planning, you can easily prepare your home for winter. Let us explore why plumbing fails when winter strikes hard. These five proven steps will protect your household plumbing network.
Understanding Why Sub-Zero Weather Cracks Residential Plumbing Lines
Plumbing lines run silently through exterior walls, basements, and crawlspaces. Homeowners rarely inspect these dark spaces during mild autumn afternoons. Many people focus on indoor crafts or learning how to build a simple wooden coffee table instead of winterizing utility areas. When polar air rushes in, unheated structural zones cool rapidly. Thin exterior walls lose thermal energy directly through structural wooden framing.
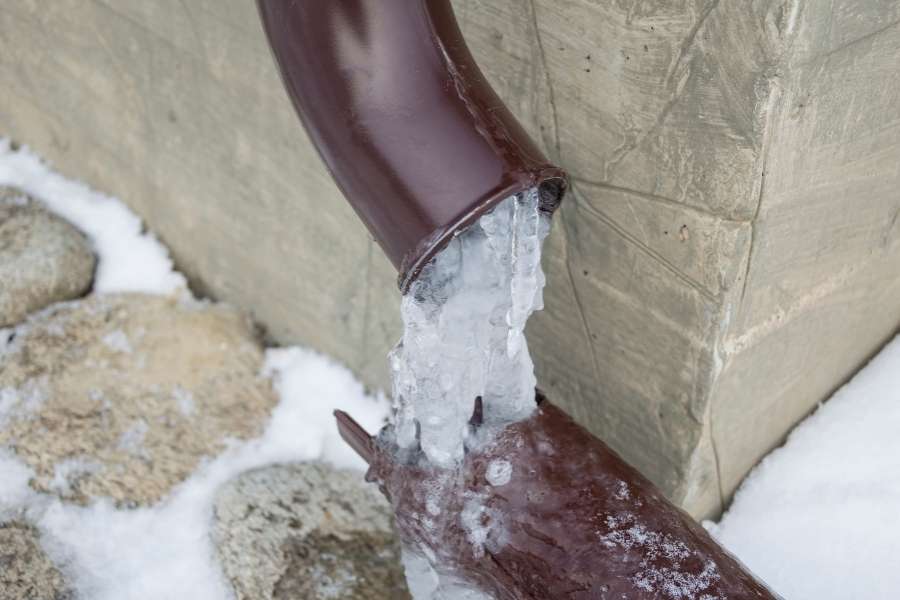
Standing water inside exposed lines quickly turns into rock-hard ice. Ice expansion creates dangerous hydraulic blockages between valves and meters. Water expands by roughly nine percent as it turns solid. Trapped water between an ice plug and a closed faucet has nowhere to go. This confined hydrostatic force ruptures copper, PVC, and PEX walls easily. A split pipe floods your property the moment the ice thaws. Identifying vulnerable plumbing spots helps you take targeted protective measures. Exterior spigots, unheated garage lines, and vented crawlspaces face extreme risks. Lines running near drafty basement windows face constant winter winds. Fixing these vulnerable zones early prevents sudden seasonal structural damage.
The Physics of Water Freezing Inside Confined Lines
Ice crystals expand outward with immense mechanical force inside plumbing runs. That expanding ice exerts several thousand pounds of pressure per square inch. The actual rupture rarely occurs right at the frozen blockage point. Instead, the break happens in the pressurized liquid downstream. Trapped water bursts through the weakest point along the pipe wall. Plumbing lines become vulnerable when outdoor weather hits twenty degrees Fahrenheit. At that point, uninsulated exterior wall cavities lose residual heat. Cold winter drafts chill exposed plumbing lines in just a few hours. Knowing this threshold helps you winterize your home on schedule.
1. Add High-Density Insulation Sleeves to All Exposed Lines
Quality insulation provides a reliable barrier against severe seasonal freezes. Proper wrapping slows down the rapid loss of ambient heat. Tackling this task resembles other quick upgrades, much like discovering 7 easy DIY projects that will transform your home this weekend to increase seasonal comfort. Foam and fiberglass sleeves shield bare lines against freezing indoor drafts. Unheated basements and crawlspaces require this protective covering on every line. Begin by inspecting all accessible plumbing runs across your property. Look for signs of surface corrosion, leaks, or deteriorated wrapping. Pre-slit polyethylene foam tubes snap over metal and plastic lines effortlessly. Seal every seam with moisture-resistant tape for complete thermal coverage. Taking the afternoon to insulate outdoor plumbing keeps remote runs safe. Prioritize plumbing runs along drafty crawlspaces and north-facing foundation walls. Continuous foam coverage stops rapid water chilling during long winter nights.
Selecting the Right Wrap for Cold Interior Spaces
Different areas of your house require specific insulating wrap materials. Standard polyethylene foam tubes work reliably in dry interior basements. Humid crawlspaces need closed-cell rubber foam to resist ambient moisture buildup. Wet insulating material loses its thermal properties and promotes pipe corrosion. Pair thick foam sleeves with electric heat tape in unheated zones. Self-regulating heat cables produce steady thermal warmth as temperatures plunge. Always follow manufacturer safety directions closely to prevent home electrical fires. Never overlap heat cables across themselves unless instructions explicitly allow it.
Proper Installation Steps for Protective Foam Sleeving
Wipe down your plumbing lines thoroughly before applying any protective sleeves. Dust, cobwebs, and surface moisture stop adhesive tapes from sticking tightly. Measure each pipe run carefully before cutting your foam tubes to size. Use a sharp utility knife to ensure straight, clean cuts. Fit the slit sleeve over the pipe with the seam aligned. Seal the longitudinal seam completely using heavy-duty moisture-resistant acrylic tape. Cover every ninety-degree elbow, pipe tee, and wall entry point. Small exposed gaps let freezing air reach bare metal surfaces.
2. Eliminate Freezing Air Infiltration Around Your Foundation
Icy air leaks present an immediate threat to your home plumbing. Cracks around basement windows and sill plates funnel freezing wind indoors. Even a tiny gap directs a freezing jet onto bare pipes. Sealing these structural cracks keeps warmth inside your utility areas. Walk through your basement on a windy day to detect drafts. Watch for visible daylight around exterior sill plates and outdoor spigots. Use a smoke pen or incense stick to identify air leaks. Sealing these entry points blocks freezing drafts before they hit pipes. Air sealing also reduces your monthly home heating utility bills substantially. Warm indoor air stays inside your living spaces where it belongs. Proper sealing helps prevent pipe bursting when sudden arctic air sweeps in.
Common Outdoor Air Leak Locations in Exterior Walls
Utility penetrations are common entry points for freezing winter air currents. Cable wires, electrical conduits, and gas lines leave oversized wall openings. Builders often fail to seal these exterior gaps with durable caulk. Over time, original sealant shrinks, cracks, and falls away from masonry. Examine the wood rim joists where your house framing meets concrete. This framing line frequently hides unsealed gaps that let cold air enter. Spray expanding polyurethane foam into large structural gaps along the foundation. Use exterior-grade silicone caulk for narrow cracks under a quarter inch.
3. Disconnect Garden Hoses and Winterize Outdoor Spigots
Outdoor hose bibbs freeze long before indoor plumbing shows any distress. Leaving garden hoses attached during freezing weather traps water inside spigots. That trapped water expands backward toward the interior foundation wall. The resulting ice splits the brass valve body inside the wall. Disconnect all garden hoses, brass splitters, and timers before winter arrives. Drain residual water from hoses and store them inside your garage. This simple chore extends the lifespan of your expensive garden equipment. It also keeps your exterior walls dry and structurally sound. Discovering how to protect pipes from freezing requires operating interior shutoff valves. Many modern homes feature dedicated indoor isolation valves for outdoor faucets. Shutting off the valve and draining lines prevents winter water emergencies.
Correct Sequence to Drain Exterior Spigots Completely
Locate the indoor shutoff valve supplying the outdoor spigot inside your basement. Turn the valve wheel clockwise completely to stop the water flow. Step outside and open the exterior spigot handle to relieve pressure. Residual water inside the line will drain out onto the ground. Return indoors with a bucket and unscrew the brass bleeder cap. Let all trapped water drain completely out of the interior valve body. Tighten the bleeder cap securely once all standing water runs out. Leave the outside spigot open throughout the winter to relieve pressure. Install insulated foam faucet covers if your plumbing lacks indoor shutoff valves. These foam shells strap directly over exterior faucets to block winds. They capture radiant indoor heat escaping through your foundation wall.
4. Maintain Steady Indoor Heat and Open Cabinets
Homeowners often turn thermostats down low when traveling to save cash. Lowering indoor temperatures too much invites disastrous plumbing freeze events. Setting your thermostat below fifty-five degrees Fahrenheit creates cold perimeter pockets. Unheated basements, utility closets, and distant bathrooms cool down fast. Keep your primary heating system running at a steady baseline temperature. Constant interior warmth shields plumbing lines hidden inside exterior walls and subfloors. Heating costs remain minor compared to massive water damage insurance claims. Reliable indoor temperatures keep your property safe day and night. Help warm air reach plumbing hidden behind closed vanity doors. Open cabinet doors below kitchen and bathroom sinks during severe storms. This allows warm household air to circulate directly around supply lines. This simple habit keeps uninsulated plumbing lines warm during sub-zero nights.
Setting Thermostats for Winter Vacations and Polar Blasts
Keep daytime and nighttime thermostat settings identical during extreme weather events. Set your central heating system to at least fifty-eight degrees Fahrenheit. Ask a neighbor to inspect your property daily if you travel. Daily home visits ensure quick action if your furnace stops working. Clear furniture away from baseboard heaters to encourage proper air circulation. Leave bedroom and utility room doors wide open during freezing nights. Balanced air movement keeps remote perimeter walls well above freezing levels.
5. Let Faucets Drip Slightly and Locate Your Main Shutoff
Running water freezes much slower than standing water inside cold lines. Opening a faucet to a slight trickle relieves expanding internal pressure. Even if ice forms, that pressure relief prevents pipe walls from rupturing. You only need a slow, steady drip to protect lines. Select a faucet served by plumbing lines running along exterior walls. Let both hot and cold lines drip slightly during deep freezes. A slow drip costs just pennies on your municipal water utility bill. That small expense provides reliable protection against catastrophic pipe failure emergencies. Locate your property’s main water shutoff valve before winter weather arrives. Every adult living in your home must know where it sits. Closing that valve immediately minimizes water damage if a pipe bursts. Quick action prevents ruined flooring, soaked drywall, and electrical hazards.
Locating and Testing Your Main Water Shutoff Valve
Test your primary shutoff valve before winter storms strike your region. Older gate valves with round wheels often freeze up from mineral deposits. Turn the wheel clockwise gently to ensure it operates without leaking. Replace stiff gate valves with modern quarter-turn ball valves for reliability. Keep an emergency curb key handy if your valve sits outdoors. Label your interior shutoff valve with a bright tag for quick identification. Rapid shutoff response saves thousands of dollars in emergency home restoration work.
Essential Autumn Plumbing Walkthrough for Complete Home Safety
Seasonal plumbing protection requires a consistent autumn routine repeated every year. A checklist ensures you never overlook detached garage lines or crawlspaces. Start your maintenance walkthrough early in autumn before the first frost arrives. Inspecting your property early prevents frantic last-minute emergency hardware store runs. Inspect your home envelope from both inside and outside the foundation. Check attic insulation for displaced batts that expose ceiling plumbing lines. Inspect crawlspace doors to confirm that weatherstripping seals tightly against winds. Taking these preventative steps brings complete peace of mind all winter. Compile a contact list of reliable licensed local plumbers ahead of time. Professional assistance helps thaw hidden frozen lines without damaging your plumbing. Never use an open flame torch to thaw frozen plumbing lines indoors. Open flames create severe structural fire hazards inside dry wall cavities. Use an electric hair dryer to warm frozen sections slowly and safely.
Frequently Asked Questions
At what temperature do residential water lines typically freeze?
Plumbing lines become vulnerable when outdoor readings reach twenty degrees Fahrenheit. Uninsulated exterior walls and drafty crawlspaces can freeze at higher readings if cold wind enters.
Does running a small trickle of water from a faucet really prevent frozen lines?
Yes, letting faucets drip relieves expanding hydraulic pressure behind developing ice plugs. Moving water also introduces thermal energy, making it harder for solid ice to form.
Can plastic PEX tubing withstand freezing temperatures better than copper pipes?
PEX expands slightly when ice forms, making it more split-resistant than rigid copper. However, repeated freezing weakens brass fittings, so PEX lines still require complete insulation protection.
What is the safest method to thaw an interior line that is already frozen?
Keep the faucet open and warm the frozen line with an electric hair dryer. Never use open flame torches, which present severe structural home fire hazards.
