
Exposed metal lines ruin a great room. They look cold, messy, and out of place. Discover six clever ways to hide exposed pipes using wood today. Natural wood panels solve this design headache instantly. They add warmth, texture, and character to any wall. You can box in unsightly lines with ease. You also turn an eyesore into a stylish focal point. Smart carpentry gives you clean results every single time. It keeps shutoff valves fully accessible for future repairs. Let us explore clever ways to hide lines with timber.
Why Wood Panels Are the Ultimate Pipe Concealment Solution
Metal plumbing lines disrupt the cozy atmosphere of living areas. Standard drywall boxes often look bulky and chip very easily. High-quality wood panels create intentional millwork that elevates your interior design. They bring organic grain and architectural charm to bare corners. Timber also dampens the sound of running drainage water effectively. Building science research confirms that solid lumber provides natural acoustic and thermal insulation. They absorb plumbing vibrations better than hollow sheetrock assemblies.
However, you must maintain quick access to all plumbing fixtures. Valves, cleanouts, and unions need regular inspection and prompt servicing. Removable timber framing lets you inspect joints without breaking walls. It delivers the perfect blend of beauty and daily practicality. You should also take time to prevent frozen pipes in winter by insulating lines before sealing them. Cold drafts trapped inside unheated wall chases can lead to burst plumbing disasters. Adding foam sleeves over copper runs keeps water flowing during extreme freezes.
Careful planning protects your home from common renovation mistakes. Trapped condensation can rot framing lumber and trigger mold growth. Selecting the right species keeps your project sturdy for decades. Always measure pipe clearances accurately before making your first cut. Quality carpentry requires patience and precision. Taking accurate measurements prevents material waste and saves money. Double-check all level lines before driving fasteners into wall studs.
Choosing the Right Substrate for Humid Spaces
Plumbing environments present unique moisture challenges for home renovators. Cold water lines sweat during hot, humid summer afternoons. Hot drainage lines expand and create minor ambient temperature shifts. Bathrooms and basement laundry zones demand water-safe building materials. Standard fiberboard swells and warps when exposed to moisture.
For damp zones, choose certified moisture resistant MDF boards instead. This engineered material utilizes moisture-repellent resins between wood fibers. It provides a flat, stable face that will never buckle. You can also rely on rot-resistant cedar or white oak. These species handle humidity swings without warping or rotting over time.
Seal every cut edge with exterior-grade primer before final assembly. Proper prep work guarantees a durable installation that lasts for years. Raw edges absorb ambient humidity like a dry sponge. Coating end grains blocks water ingress and stops fungal rot. Investing in quality preparation ensures your carpentry remains pristine for decades.
1. Build a Streamlined Vertical Plumbing Box
Vertical supply lines running down corners require immediate visual intervention. A custom-built plumbing box offers the fastest and cleanest solution. It encloses awkward pipes without eating up valuable floor space. The finished box resembles a tailored, intentional architectural support column. The woodworking joinery feels just as approachable as learning to build a simple wooden coffee table for your living room. Both projects rely on basic pocket screws, straight cuts, and clean edge alignment. Practicing basic carpentry builds your confidence for custom home improvements.
Start by securing slim timber cleats directly to your wall. Always locate hidden pipes before driving screws into wall framing. Fasten two timber faces together into an L-shaped sleeve. Use interior pocket screws and waterproof wood glue for strength. Clamping the boards tightly ensures tight, gap-free corner joints. Let the adhesive cure fully before handling the assembled sleeve.
Slip the assembled wooden sleeve directly over your exposed pipes. Fasten the sides securely into your pre-installed wall cleats. Ensure the wooden casing never touches the metal lines directly. Leaving an air cushion prevents pipe vibrations from rattling the frame. This physical gap also eliminates creaking noises during thermal expansion.
Caulk the wall joints using flexible, paintable acoustic sealant. This stops sound leaks and hides minor wall surface irregularities. Finish the box with matching wall paint or rich stain. The intrusive pipe run disappears completely into your room decor. Your newly boxed corner looks like an intentional piece of architecture.
2. Install a Slat Wall with a Hinged Access Panel
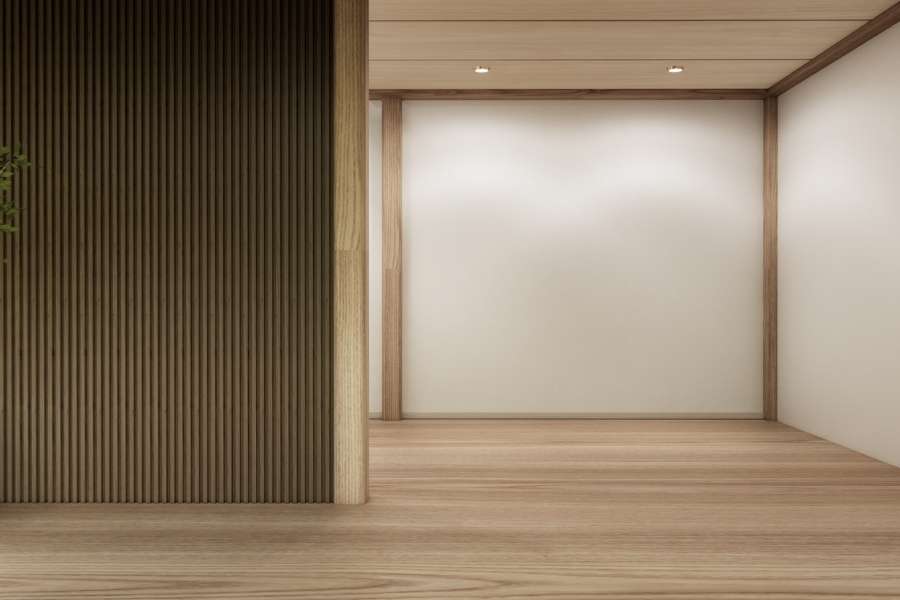
Vertical wood slats are a favorite in modern interior design. They add architectural rhythm, deep shadow lines, and tactile warmth. Extending wooden slats across an entire wall hides protruding pipe chases. The repeating vertical gaps trick the eye into seeing flat space. This visual camouflage turns an ugly pipe into pure art.
Plumbing codes strictly forbid burying shutoff valves behind solid walls. You must integrate a seamless hinged access panel into your slat wall. Mount three or four decorative slats onto a small sub-frame. Install a concealed piano hinge along the interior support cleat. Align the moving slats carefully with the fixed wall pattern.
Use an invisible touch-latch or a sturdy magnetic catch inside. This completely eliminates the need for exterior cabinet knobs or handles. The hidden door swings open smoothly whenever you need emergency access. Your plumbing stays code-compliant while remaining completely invisible to guests. Clean lines remain unbroken across the entire room feature.
- Choose straight hardwood slats with low moisture content.
- Keep equal spacing between slats across the entire wall surface.
- Check the swing clearance so moving slats do not bind.
- Test the latch mechanism thoroughly before painting or staining wood.
3. Build a DIY Wooden Box to Conceal Basement Plumbing
Basement ceilings often feature low-hanging drain pipes and copper manifolds. These exposed mechanical lines make finished rooms feel industrial and unfinished. Learning how to build a DIY wooden box to conceal basement plumbing saves money. It restores ceiling height without the expense of a drop ceiling. A custom bulkhead creates clean, orderly overhead visual lines.
Construct a sturdy horizontal ladder frame from kiln-dried framing lumber. Secure this framing directly into your overhead ceiling floor joists. Fasten smooth wood panels across the bottom and sides of the frame. Counterbore your screw heads so they sit flush with the surface. A flush surface makes filling and sanding much faster later.
Pipes inside horizontal ceiling chases often experience wide temperature swings. Wrap your cold water lines in foam insulation before closing framing. This simple step stops condensation from dripping onto the wood panels. It protects your carpentry from moisture damage and hidden rot. Dry lumber stays rigid and resists seasonal warping over time.
Leave a continuous shadow gap along the upper ceiling edge. This shadow gap allows natural air exchange inside the overhead chase. It keeps air moving freely around the concealed plumbing lines. Your basement ceiling looks crisp, tailored, and clean. You gain a comfortable living area that feels completely finished.
4. Construct Floor-to-Ceiling Shelving Around Pipe Stacks
Large vertical drain stacks often run straight through open living areas. A simple boxing technique can look like an awkward, bulky bump. Surrounding the stack with floor-to-ceiling built-in cabinetry provides functional storage space. It conceals mechanical runs while giving you practical display shelves. Built-in storage adds substantial practical value to any home layout.
Build the main cabinet frame using sturdy hardwood veneer plywood. Create a dedicated hollow chase cavity in the back corner. Run your pipes safely inside this isolated vertical service space. The remaining front depth holds books, decor, or media components. Deep shelves turn wasted mechanical space into organized home storage.
Make the interior cabinet backing panels removable for routine maintenance. Secure them with simple friction catches or light counterbored screws. A plumber can pop the panel out in seconds during emergencies. You protect your expensive cabinetry while keeping your plumbing accessible. Modular panels prevent costly demolition during unexpected plumbing leaks.
Finish the exterior structure with matching baseboards and crown trim. This ties the new built-in furniture directly into your architecture. Add warm LED strip lights to illuminate your display items. Guests will admire your beautiful shelving rather than your plumbing lines. The entire installation blends seamlessly into the surrounding room walls.
5. Add Decorative Louvers for Hot Hydronic Lines
Heating pipes and radiator feeds emit high levels of radiant heat. Enclosing hot pipes inside an airtight wooden chase creates serious problems. Trapped heat damages wood joints, blisters finishes, and lowers heating efficiency. Discovering stylish ways to box in wall pipes at home requires clever thermal planning. Unvented woodwork dries out rapidly and cracks along delicate seams.
Cut open slots into your front panels and install decorative louvers. You can also insert woven brass grilles or patterned metal screens. These decorative openings allow hot air to draft out into the room. They protect the casing while providing continuous heating efficiency. Beautiful grilles add vintage character to modern or traditional interiors.
Leave adequate breathing clearance between hot pipes and interior wood framing. Line the interior face of your wooden panels with foil insulation. The reflective backing bounces radiant heat directly through the front louvers. This keeps the exterior surface safe and cool to the touch. Your heating system functions efficiently while your woodwork stays protected.
Creating a Continuous Airflow Channel
Convection currents require continuous airflow along the entire pipe assembly. You must cut a two-inch ventilation gap along the lower plinth. Cut an identical opening along the top edge of the enclosure. Cool air enters below, warms up, and exits above smoothly. Natural airflow balances interior temperatures without needing noisy mechanical fans.
This chimney effect prevents extreme heat pockets from forming inside. It protects glues from softening and stops solid boards from splitting. Test your assembly while running your heat at maximum operating temperatures. A well-vented design delivers safe heating and beautiful visual results. Your custom casework remains stable and durable throughout harsh winters.
6. Install Wainscoting with a Hidden Service Pocket
Horizontal pipes running along baseboards make furniture placement very difficult. Installing traditional wainscoting across the lower wall hides these runs cleanly. Bump the lower wall section out three inches using wood furring. The new paneling covers the horizontal pipes along the entire room. A continuous ledge establishes clean architectural proportion across the space.
Trim the top edge of the wainscoting with primed molding. This bumped-out ledge doubles as a practical, charming picture display rail. You can display framed art prints and small potted plants easily. The entire room gains timeless architectural character and elegant depth. Traditional paneling conceals low water lines and drainage pipes effortlessly.
Mount individual panel sections using hidden magnetic fasteners or friction cleats. These detachable sections function as quick service points for hidden valves. You access pipe cleanouts instantly without damaging your fine interior millwork. It turns an awkward layout issue into a custom carpentry feature. Every plumbing valve stays within reach for quick shutoff actions.
Ensure the lower perimeter leaves ample room for expansion and cleaning. Install baseboard shoe molding with a small expansion gap below. This gap prevents floor mop water from wicking into panel ends. Your lower wall cladding stays fresh, clean, and completely undamaged. Fine carpentry elevates the value and comfort of your home.
Professional Finishing Steps for Wood Pipe Enclosures
Careful surface preparation separates amateur carpentry projects from professional work. Countersink every screw head slightly below the wood panel surface. Fill fastener holes with matching wood filler or tapered timber plugs. Sand the entire surface smooth using progressively finer sandpaper grits. Vacuum all sanding dust away before opening your paint cans.
Apply two coats of stain-blocking primer over raw wood surfaces. This prevents natural timber knots and tannins from bleeding through paint. Apply a durable semi-gloss or satin paint finish for lasting protection. High-grade enamel paint resists scuffs, fingerprints, and bathroom water splashes easily. Quality paint creates a washable surface that withstands daily household wear.
If you prefer natural wood grain, use an oil-based stain. Protect the stained surface with three coats of clear polyurethane sealer. Coat all end-grain cuts thoroughly to block moisture absorption from floors. Proper sealing keeps your wooden concealment box stable for decades. Careful finishing turns simple timber into refined home furniture.
Code Compliance and Safety Rules for Enclosed Plumbing
Always check local residential building regulations before building enclosed wooden chases. Never drive fasteners, screws, or brad nails directly into pipes. Maintain a clear one-inch buffer between hot pipes and wood framing. This buffer prevents annoying creaking noises as metal lines expand. Safe clearances keep your household quiet and compliant with building codes.
Take clear reference photos of all pipes before sealing your framing. Include a tape measure in your pictures for future remodeling reference. Never seal natural gas lines inside an airtight, unvented wooden chase. Learning how to build a decorative cover for unsightly pipes requires safety first. Proper safety practices protect your investment and give you peace of mind.
Consult with licensed building contractors whenever you modify structural wall members. Cutting into weight-bearing studs to bury plumbing compromises your house framework. Surface-mounted boxing provides a far safer alternative to destructive structural modifications. You maintain full structural integrity while achieving clean, hidden plumbing aesthetics.
FAQ
Can I box in pipes with wood panels in a bathroom without risking mold?
Yes, you can safely enclose bathroom pipes with moisture resistant MDF boards. Wrap cold lines in foam insulation to stop sweating and moisture buildup. Provide a continuous ventilation gap to keep air circulating inside the chase.
How do I ensure emergency access to shutoff valves inside a wooden chase?
Install a dedicated hinged access panel directly over your shutoff valves. Use an internal touch-latch or a strong magnetic catch for closure. Avoid using permanent nails or glue that block access during plumbing emergencies.
What wood thickness works best for building pipe concealment boxes?
A thickness between 1/2 inch and 3/4 inch works best. Thinner boards warp easily, while 3/4-inch boards hold screws and hinges securely. This thickness provides great rigidity and blocks water rushing sounds effectively.
